Adding connectivities is very complex issue because it is hard to anticipate what the user will want to do. Will the user want to enter shift values, will the user want to add peak Ids, how does the rest of smartnotebook deal with connectivity records that don't have all peaks picked, what happens if reference peaks are entered which have not been picked, etc, etc? Given that peakcon rules are constructed to not miss any connections, then is it not better to encourage the user to fix up the peaklists and then your connectivity will be found? Absolutely!
Well, there is at least one case where peakcon will fail and I will go through that example here. This example shows that complex patterns can cause connectivity searching software to misinterpret what is really happening. Thus there needs to be a mechanism to allow the alert spectroscopist to manually tell smartnotebook about correct connectivities. If you interested in improving upon this current mechanism, or have comments, please send email to the snb author(s).
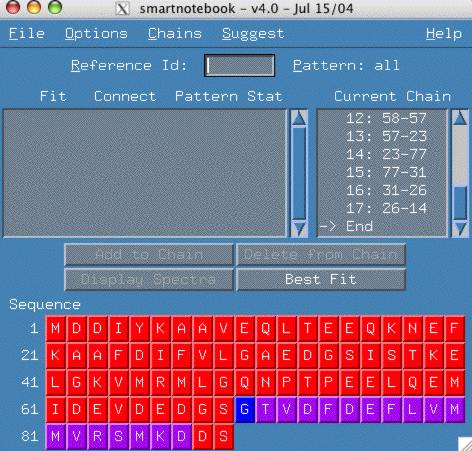
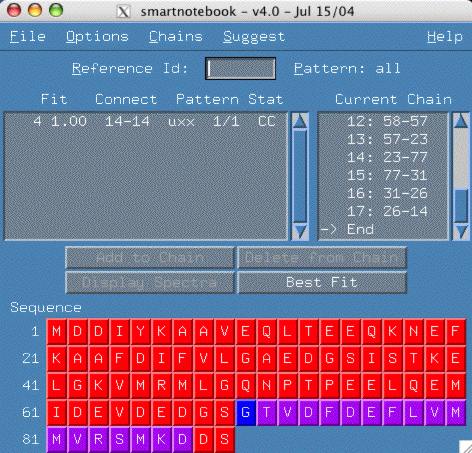
Notice in the figure below that we have come to the end of the chain and no connectivity exists that allows us to continue the chain. The following example is from the "hnco-mxl" dataset example and you can try it yourself.
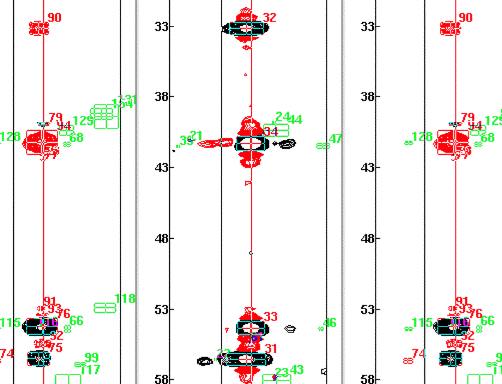
However, the intensity of the peaks of reference spectra 14 and the 4 strong peaks in the cbcaconnh leads us to believe that there is double overlap of peaks, so what we really need is a 14-14 connection. This type of connectivity cannot be found with the simple peakcon program.
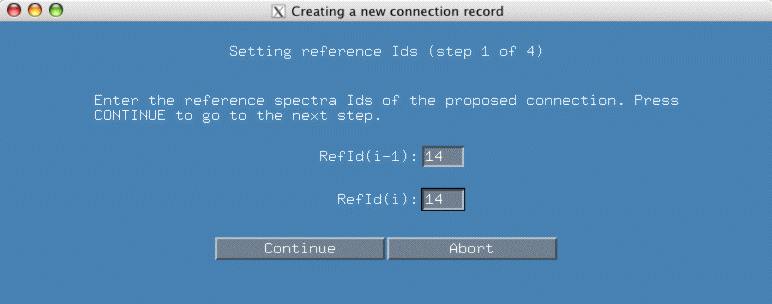
So we start by invoking the create connectivity menu item and enter the reference Ids as follows.
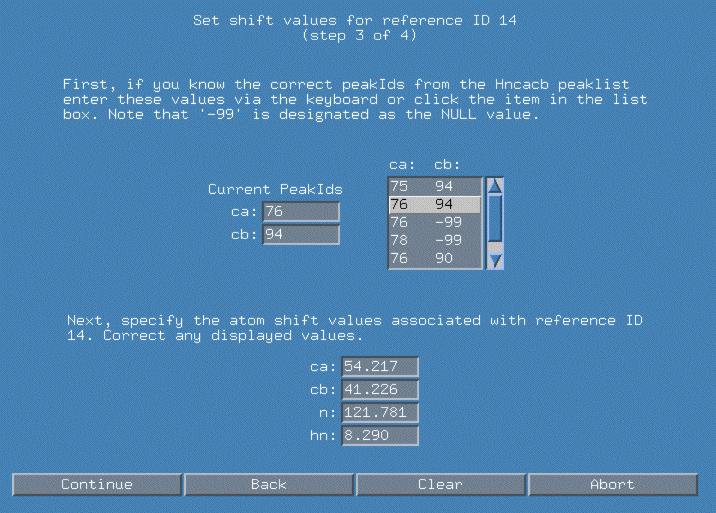
In the next popup window, smartnotebook has gone through the connectivity list and found all the connectivities involving refId(i-1) 14. There are a number of connectivities with different peak Ids for Ca and Cb. Based on the previous spectral display, we have clicked on the line "76 94" as the peakIds which represent Ca/Cb. Because we have selected this pair, the atom values are automatically filled in as displayed in the bottom panel. We hit continue to proceed to the next panel.
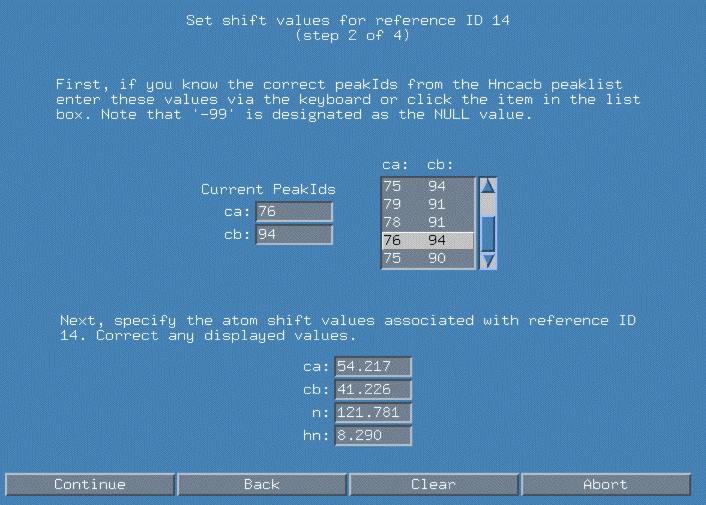
We now proceed in a similar fashion to fully qualify refId(i) 14. Again, I can choose the "76 94" peakId combination to represent my Ca/Cb. Note that we may want to corrent any of the atom values if closer examination of the spectra allows us to differentiate those values.
Finally after hitting "Continue", snb will ask us to verify saving the new connectivity in file which has a default name of snb.out/con.submit.uxx . If you view the file, you can see that the default probability of the connectivity is "1.0" and that the connectivity type is arbitrarily signified with as "uxx".
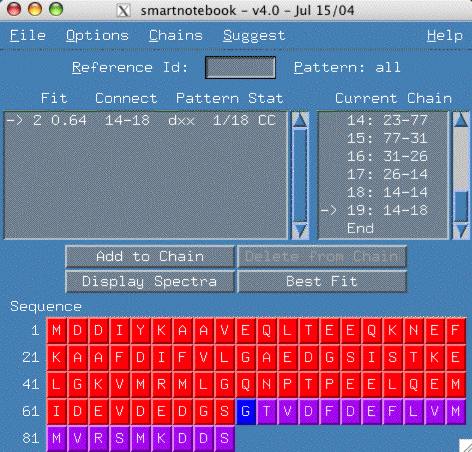
So now when we go back to the chains menu and press "End" we see our 14-14 connectivity is available to add to the end of the chain.
We are now able to finish the chain to the end of the sequence.
This file last updated: Questions to: bionmrwebmaster@biochem.ualberta.ca